Color Negative Scanning Method V2.1
by Gijs Oortgiese
First written 03-2014. Edited on 04-01-2015.
Introduction
This color negative scanning method is based on different scanning methods found all over the internet and has some experimental steps in it. This tutorial does not go into detail about exposing your film or how to develop it, it’s only covering the scanning method used by Gijs Oortgiese.
Scanner type
Please selecte your scanner type for the apropiate tuturial. Please note that this scanning method is developed for dedicated filmscanners and that the flatbed (Epson) tuturial is experimental.
Required
Software
For this scanning method two pieces of software are required all though alternative software could probably be used. This tutorial will only cover the steps for the following software:
- VueScan Professional Edition (Most likely required)
- Adobe Photoshop CC (Older / newer versions or alternative software is possible)
For this scanning method two pieces of software are required all though alternative software could probably be used. This tutorial will only cover the steps for the following software:
- EPSON Scan (Comes with your Epson scanner)
- Adobe Photoshop CC (Older / newer versions or alternative software is possible)
Hardware
The only hardware required for this scanning method is a scanner with which you can scan film. A dedicated film scanner is recommended for maximum image quality. The scanner used in this tutorial is a Nikon Coolscan V ED.
The only hardware required for this scanning method is a scanner with which you can scan film. A dedicated film scanner is recommended for maximum image quality. The scanner used in this tutorial is a Epson Perfection V500 Photo.
Other
A gray card. If possible also a white and a black card for reference.
List of steps in this tutorial
All steps
All these steps below should be followed to create your first scan and calibration:
- Shooting a calibration for a film type;
- Setting the basic configuration;
- Locking the film exposure and the film base color;
- Scanning
- Creating the calibration from the photo shot at step 1;
- Applying the film calibration;
- Correcting the image;
- Saving the image as JPEG.
- Shooting a calibration for a film type;
- Setting the basic configuration;
- Scanning;
- Creating the calibration from the photo shot at step 1
- Applying the film calibration;
- Continue to step 7;
- Correcting the image;
- Saving the image as JPEG.
Steps for scanning when the calibration has been made
The steps from the list above that should be followed when the calibration already has been made: 2, 3, 4, 6, 7 and 8.
The steps from the list above that should be followed when the calibration already has been made: 2, 3, 5, 7 and 8.
Step 1:
Shooting a calibration for a film type
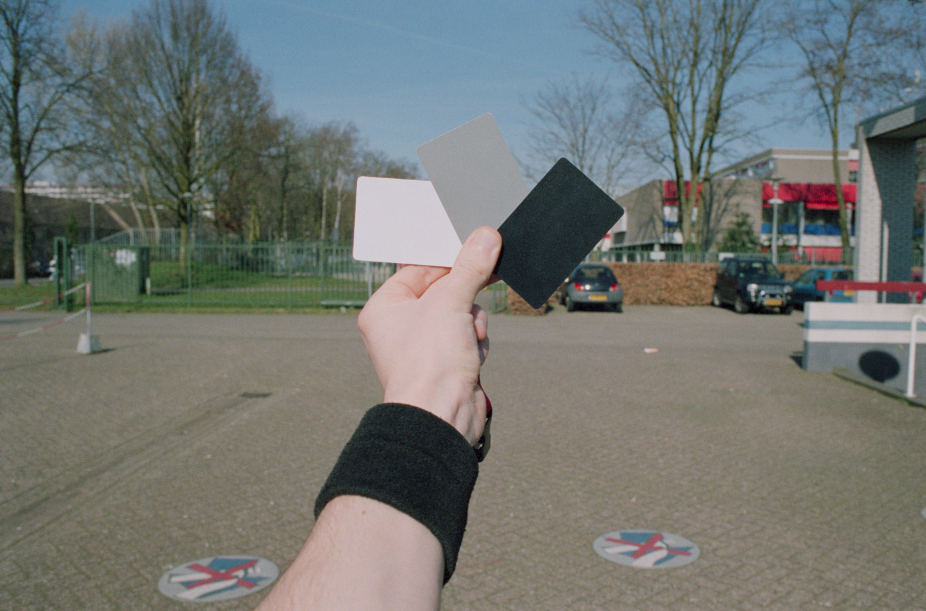
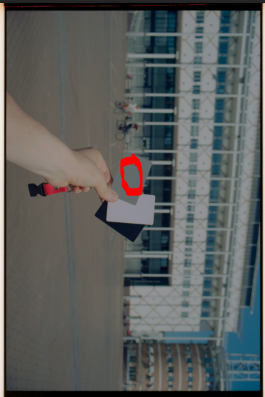
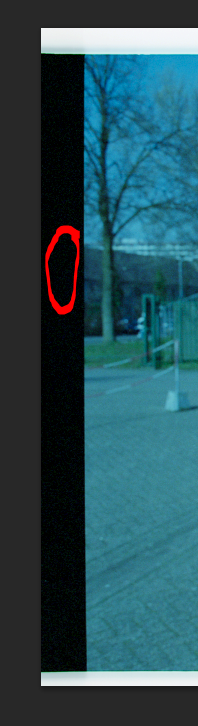
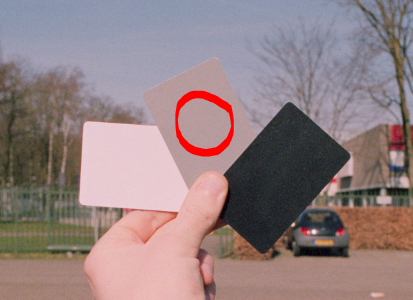
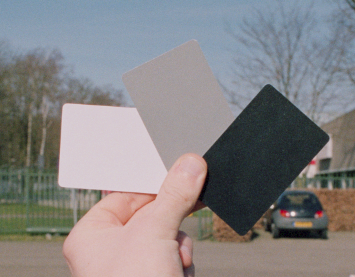
For creating a calibration you will need to shoot one photo of a gray card and if possible also a white and a black card. The important thing is to shoot this photo at the correct light conditions. So if the film is a daylight type of film, you should shoot your calibration in daylight conditions (A clear sky at midday).
For exposing the calibration photo you should shoot at the box speed of the film, so if the film says ISO 400 set your light meter at ISO 400. If you push or pull you probably want to calibrate at the new ISO.
Adding in your own hand, a black card and a white card will make judging your calibration later on easier.
Step 2:
Setting the basic configuration
After you got your film back from the lab (Developing your film at the same lab every time is recommended for consistent results) it’s time for setting up the scanner software.
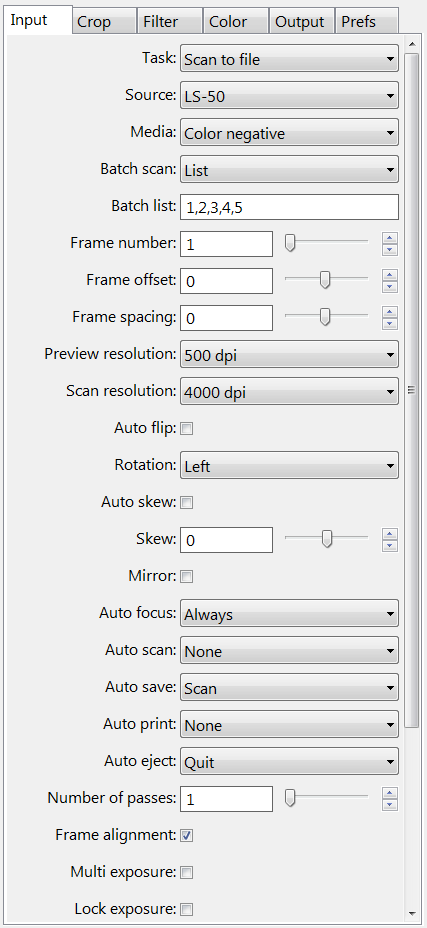
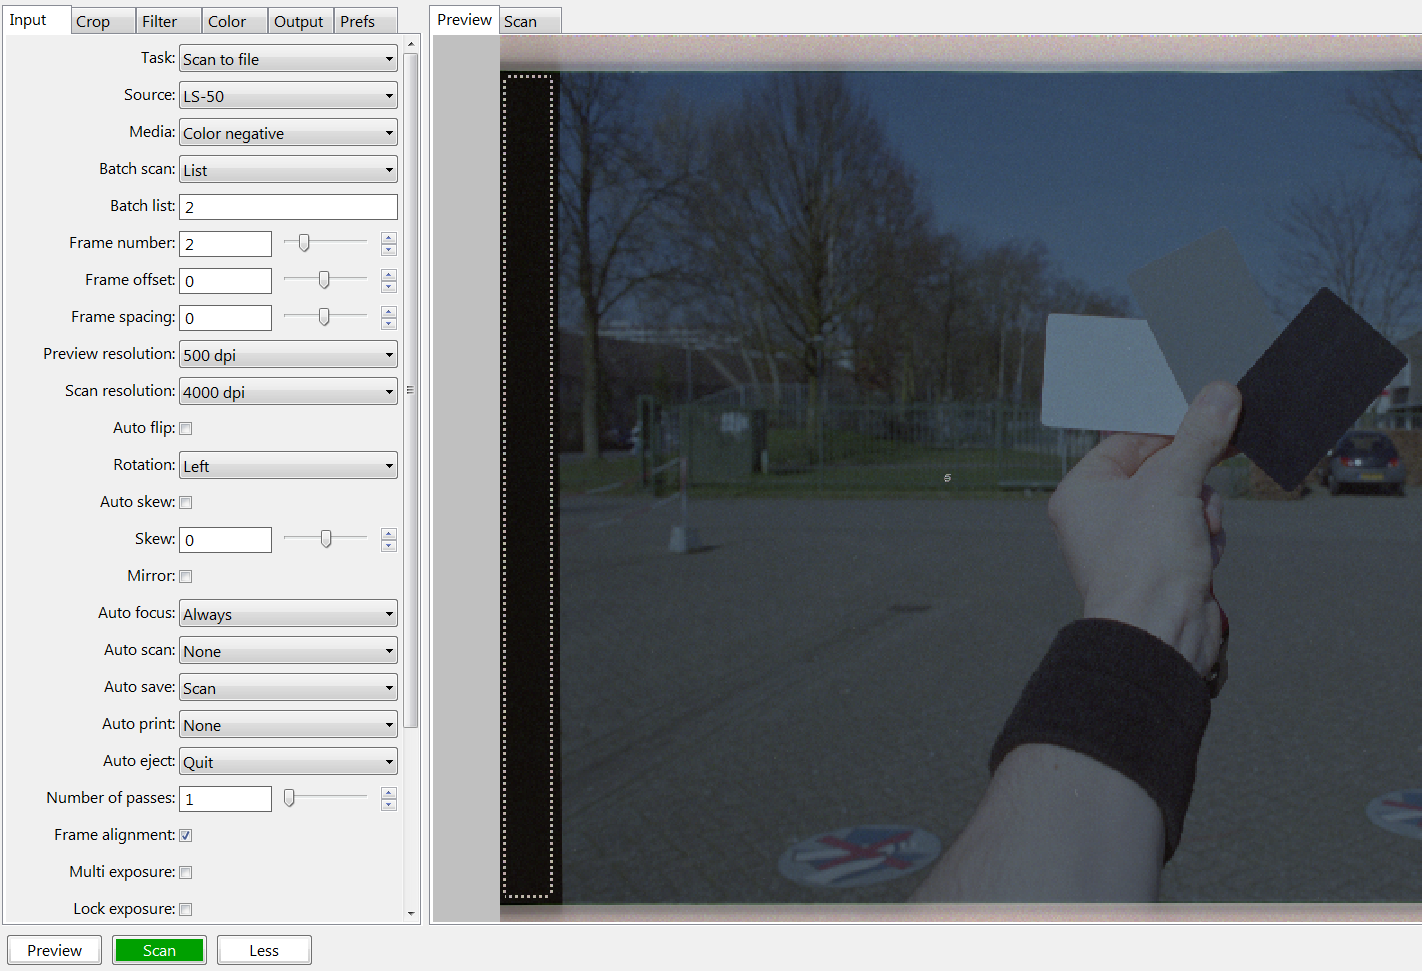
For this method VueScan will be used to create raw scan outputs with Digital ICE applied. Connect your scanner to your computer and start VueScan. When VueScan is started apply the following settings at the Input tab:
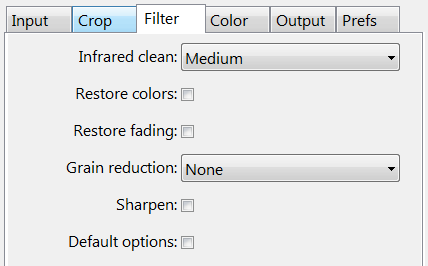
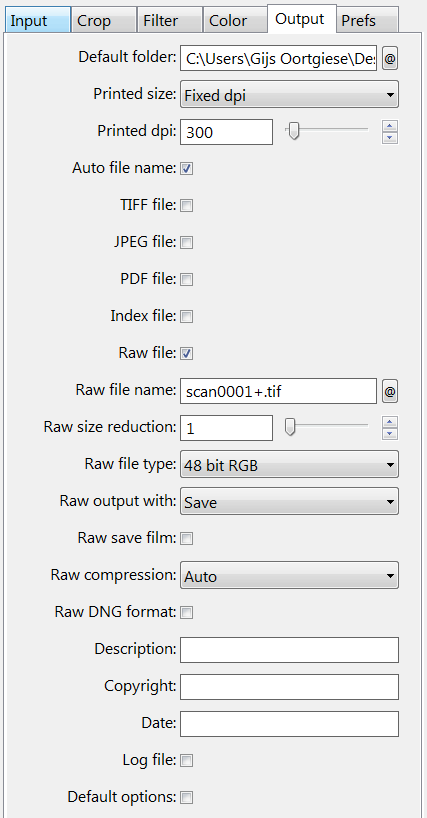
At the Output tab set the way of exporting the scan to a digital file. We will scan to a raw file which is nothing but the scan with the infrared cleaning applied (if active).
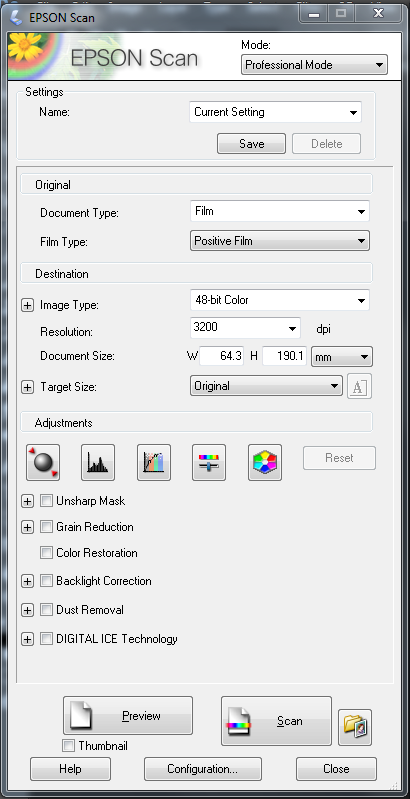
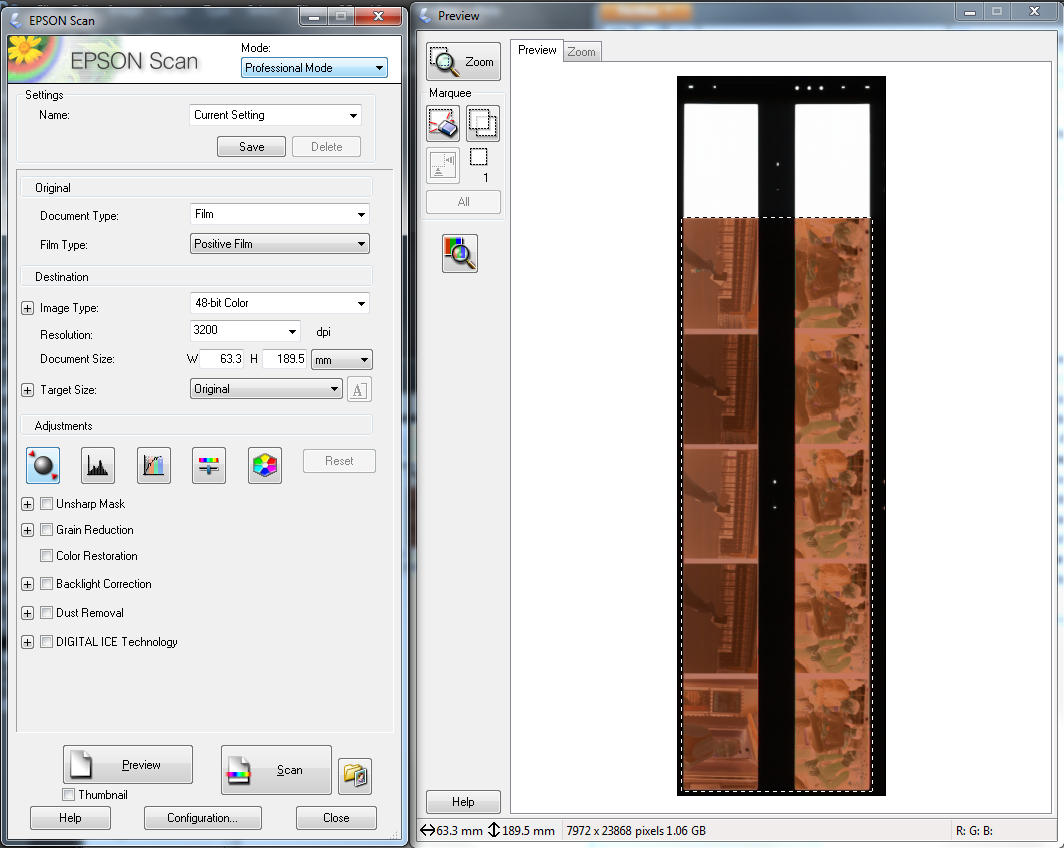
When scanning in EPSON Scan we will be scanning our negatives as positives. So open EPSON Scan in Professional Mode and apply the following settings:
Step 3:
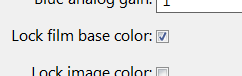
Locking the film exposure and the film base color
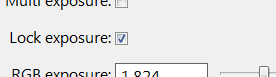
Now that the settings have been set in VueScan you can start to feed in a negative strip. We will be scanning the black space between two frames. Set the Batch list in the Input tab at the number of the frame that you want to scan. and press Preview. After the preview has been made select the black space between two frames.
You might need to set the frame offset to get the black space between the frames visible.
Scanning
Now place the negatives you would like to scan in the film holder. If you have not yet created a calibration for your film type make sure to scan the negative containing the calibration photo first. After setting all the settings press Preview. Your scanner will now scan the entire document. When the preview has been made you will see all the negatives you have placed in your film holder. You might need to choose the eraser button under Marquee for removing any previous made selections.
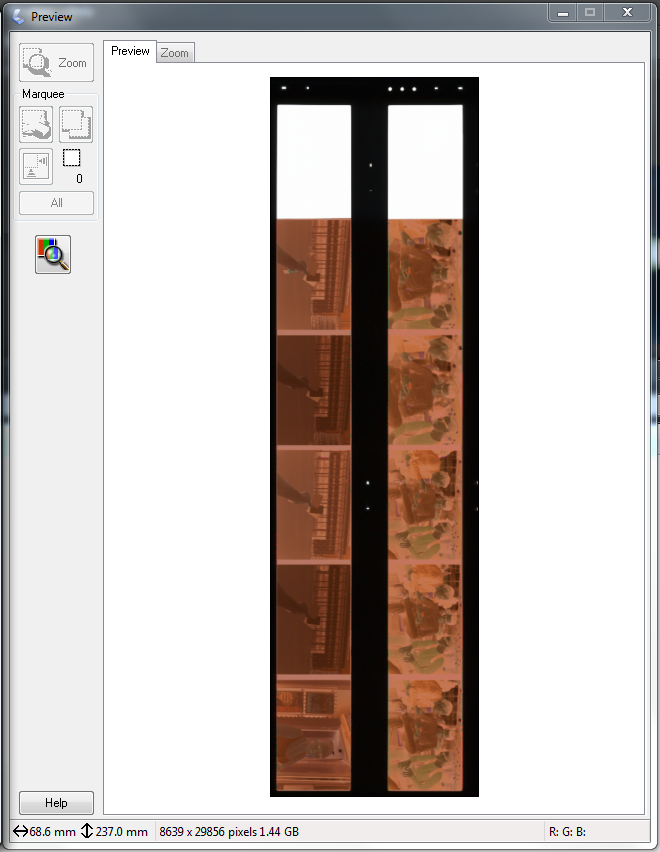
Make a selection of all the negatives. The images in your selection will now get brighter, but we don’t want the correction to happen so chose in EPSON Scan for Reset in the Adjustments tab. Your negatives will now be dark again.
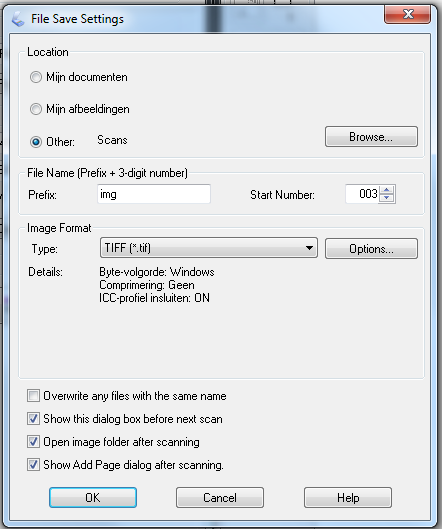
After making the selection press Scan. A dialog will pop up. Set the settings as follow:
Step 4:
Scanning
When the exposure and the film base color have been set you can start scanning after you have set the Crop size to Maximum in the Crop tab. When you have not created a calibration for the film start with scanning the gray card that you have shot earlier. If you already have a calibration you can start from the frame(s) that you wish to scan.
In the Batch list box of the Input tab fill in the frames you would like to scan.
Press the scan button and all the frames filled in in the batch list box will end up in the folder that you have picked earlier.
Creating the calibration from the photo shot at step 1
Go to the folder in which the scanned file (containing the calibration photo) is located and open the file into Photoshop.
When opened in photoshop apply a Curves Adjustment layer to invert the image to positive by dragging the RGB curve.
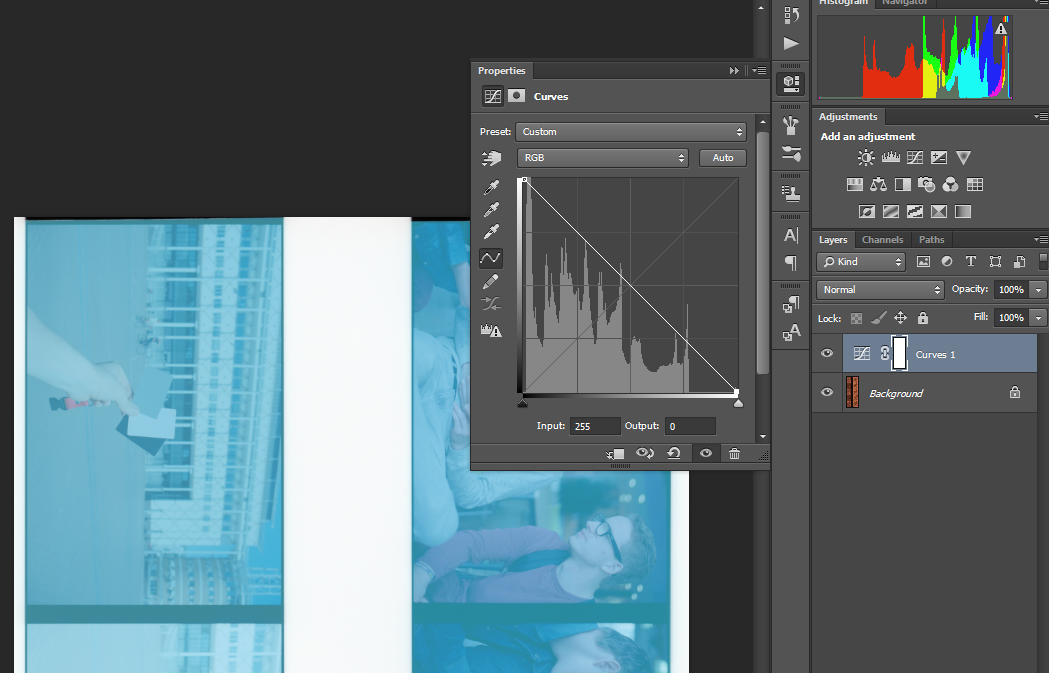
After you have created the first curve to invert the image create a second Curves Adjustment layer and set the black and gray point:


The colors of the image will now be fine or close to fine. You can edit your Curve Adjustment Layer so that the colors in the image are correct. Now save the two Curve Adjustment layers so you can apply them to other scans that you make. Option one: Save the Curve Adjustment layers in a photoshop document that you can open later on. Option two: Create an action containing the two Curve Adjustment layers. Option three: Save the curves as a curve preset.
Step 5:
Creating the calibration from the photo shot at step 1


Left curve point:
Input: 0
Output: 255
Middle curve point:
Input: 64
Output: 127
Right curve point:
Input: 255
Output: 0
The middle curve point value may differ depending on your scanner! Experiment with it.
After you have created the first curve to invert and darken the image create a second Curves Adjustment layer and set the black and gray point:

The colors of the image will now be fine or close to fine. You can edit your Curve Adjustment Layer so that the colors in the image are correct. For the film shown above I took out some red by adjusting the red curve.
Applying the film calibration
After you have created your calibration for a film type you can apply this to other scans from the same film type.
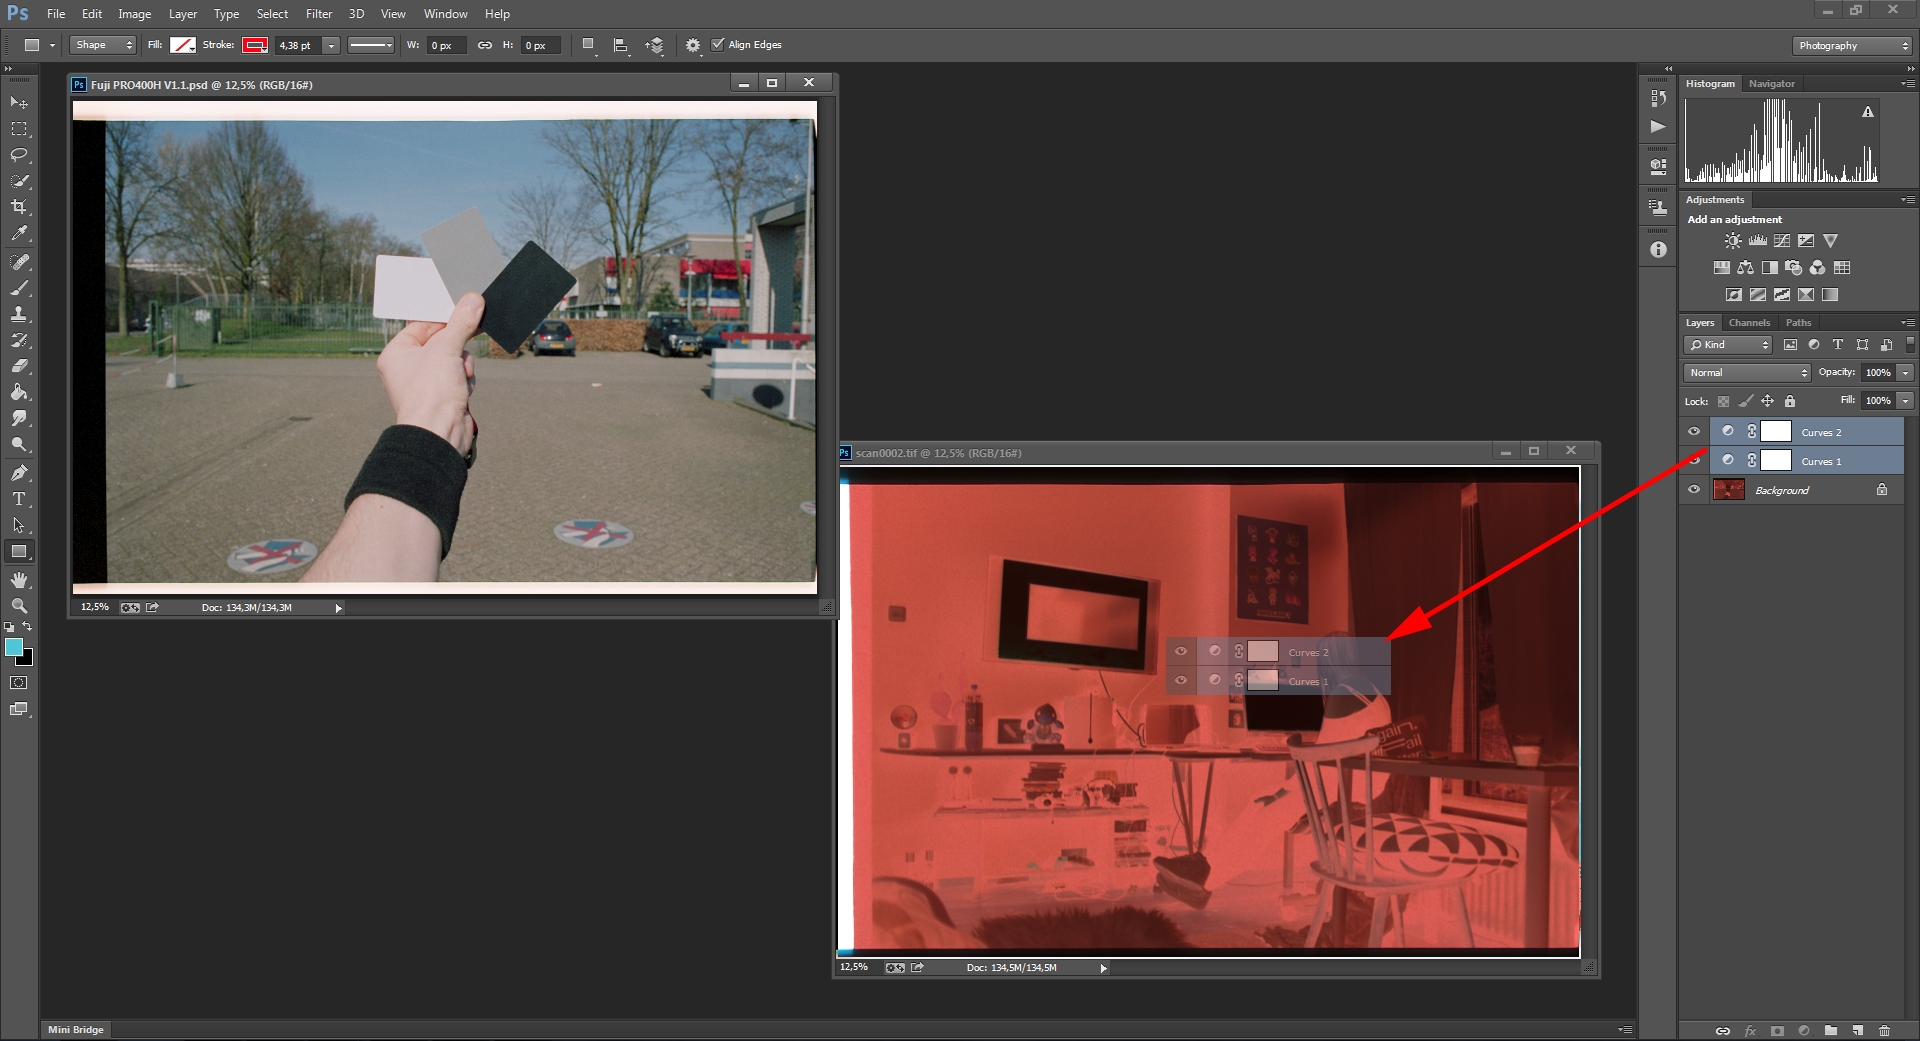
Scan all the frames that you would like to digitalize and open them in Photoshop to apply the Curve Adjustment layers from your calibration. You can drag and drop the Curve Adjustment Layers from your calibration file to the new scan as shown below.

After setting your calibration save all the individual frames as a TIFF file. You can do this by selecting a frame and then choosing for Edit > Copy Merged. Go to File > New (the correct document settings should already be filled in) and press OK. Paste the image into the document and save the document File > Save As…. Save the document as a TIFF and in the TIFF Options dialog chose for Discard Layers and Save as Copy.
Step 6:
Applying the film calibration
After you have created your calibration for a film type you can apply this to other scans from the same film type.
Scan all the frames that you would like to digitalize and open them in Photoshop to apply the Curve Adjustment layers from your calibration. You can drag and drop the Curve Adjustment Layers from your calibration file to the new scan as shown below.
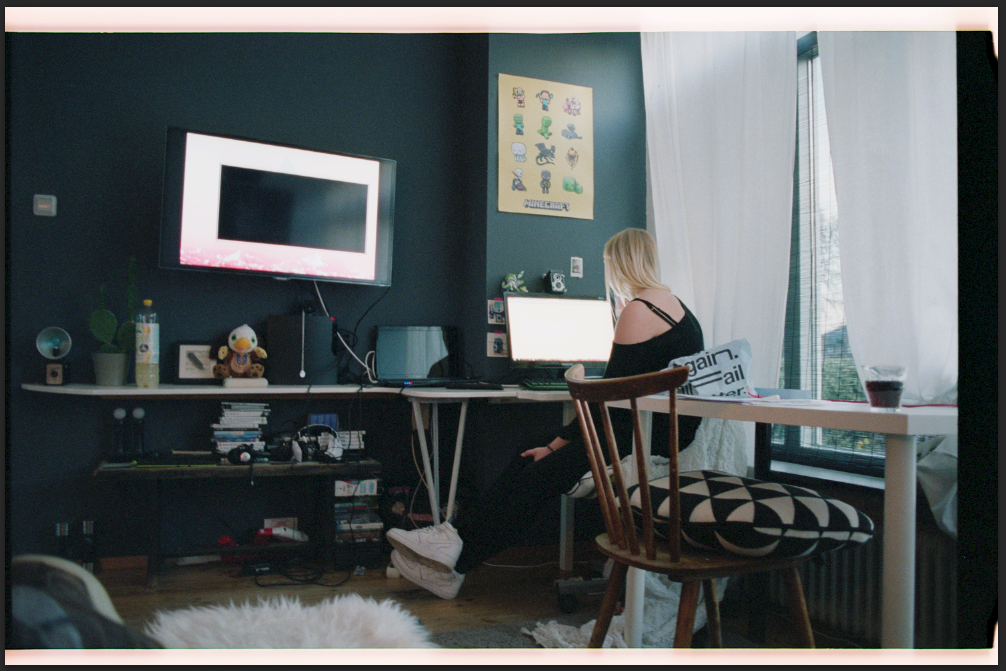
The colors of your scan will be set:
This is the base correction of your image and in the next step you will be finishing your image.
Continue to step 7
This is a placeholder for step 7 of the normal scanning method. (You are curently vieuwing the EPSON Scan method)
Step 7:
Correcting the image
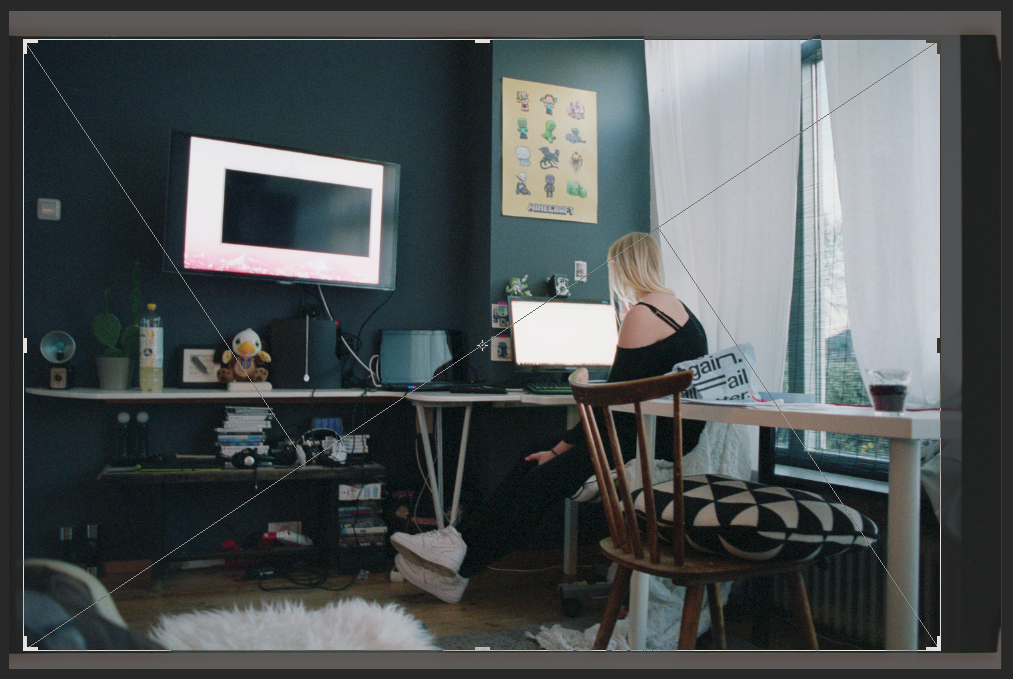
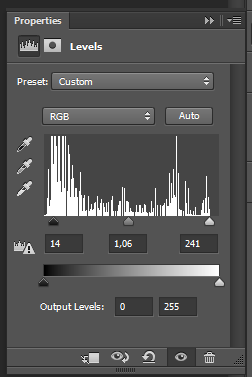
After applying the calibration to your scans you can now finish the scan by setting crop, levels, color balance and other adjustments that you wish to do.
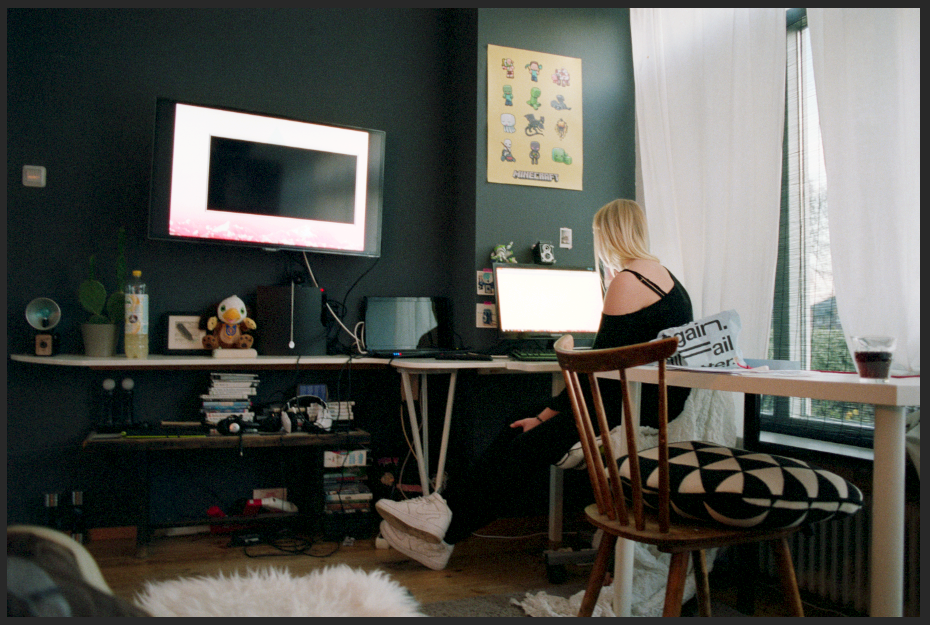
Start by cropping (and rotating if necessary) your image, I recommend cropping your image in a 2:3 aspect ratio. If you uncheck Delete Cropped Pixels you will be able to change your crop later on.

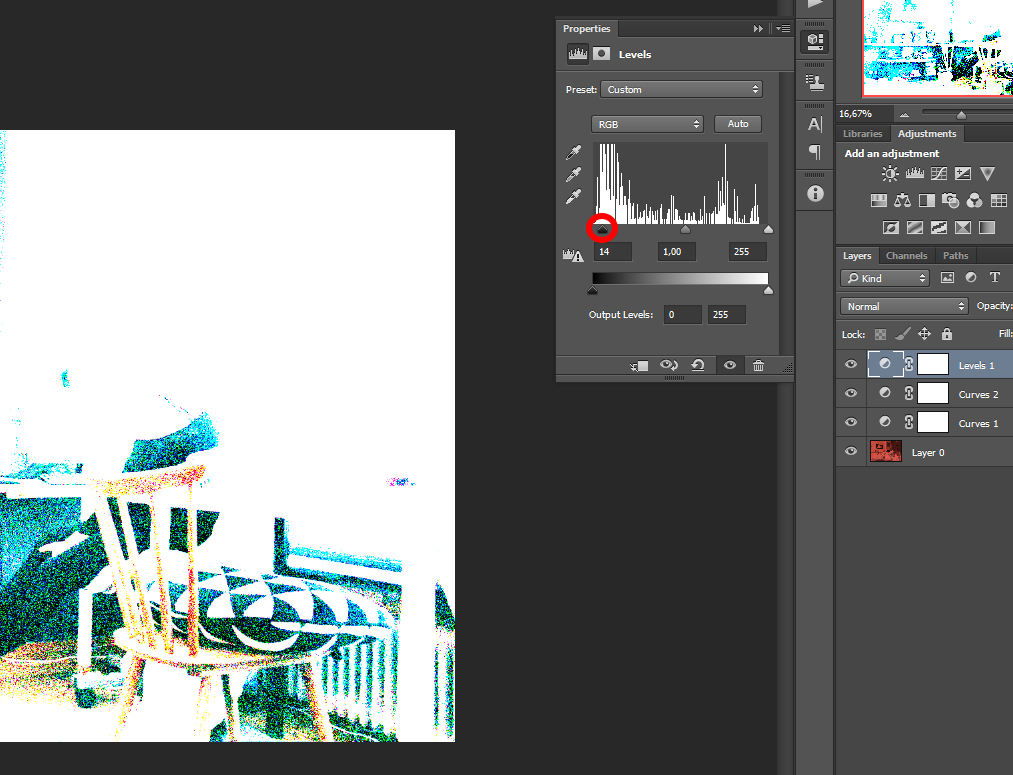
Create a levels adjustment layer and set the black point by (holding alt and) dragging the left marker. Stop until there is enough black in the image.
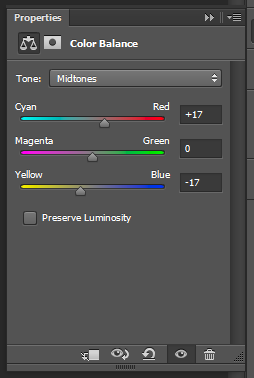
Create now a color balance adjustment layer and correct the colors if necessary.
You can now apply other changes to the image if you wish. You can also sharpen your image by applying sharpening to the negative image. Removing grain is also possible.
Finally save your image as a PSD or TIFF file so you can later export it to a JPEG and still be able to change anything you wish. If you save as TIFF make sure you save the layers and do not discharge them.
Step 8:
Saving the image as JPEG
For saving your image(s) I recommend converting it to an 8-Bit, RGB file with as color profile sRGB. This makes your images save to publish on the internet or send to a printing service. You can convert your image in Photoshop by opening it.
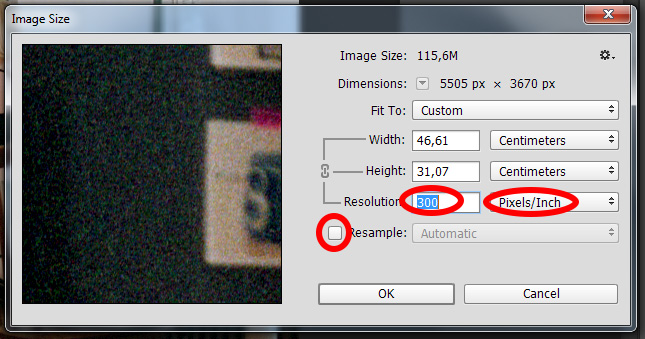
When the image is opened into Photoshop start by making sure your image is 300ppi. You can check/edit this at Image > Image Size.... If your ppi (Resolution) is not set to 300: Uncheck Resample and change Resolution to 300. Make sure that the dropdown menu behind resolution is set to Pixels/Inch. Press OK.
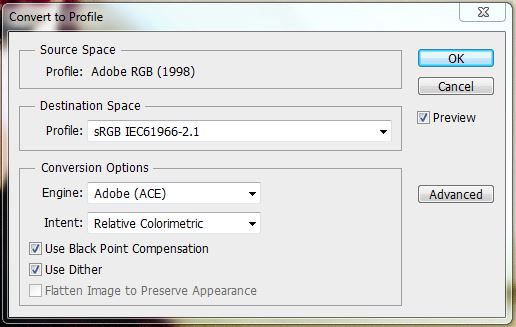
You can convert it to RGB (It will most likely already be a RGB file) by converting it to sRGB with Edit > Convert to Profile and choose as Destination Space: sRGB IEC61966-2.1. Press OK to convert the color profile. Then convert it to an 8-Bit image by choosing Image > Mode > 8 Bits/Channel.
Your image is now ready to be saved and shared or printed. For saving as JPEG I recommend saving it with quality 10 instead of 12 since there is no visual quality difference, only a way bigger JPEG file.
Finally
I hope this was usefull
This scanning method is experimental and may change overtime so I recommend checking this document now and then.
Make sure to spread the analogue film love and knowledge to everyone around!
For results of the scanning method visit one of the following pages which will be updated frequently with new photos. All the photos will be posted together with the information about the film, camera, and scanning method and if not feel free to ask me about it.
onfilm.gyzie.com Instagram: instagram.com/gijsoortgiese
If you have any questions you can contact me via gijsoortgiese.com, one of the social media pages or info@gyzie.com, but your question might already be answered so please check the FAQ before asking me.